Terminal Shell Integration
Terminal Shell Integration is a key feature that enables Kilo Code to execute commands in your terminal and intelligently process their output. This bidirectional communication between the AI and your development environment unlocks powerful automation capabilities.
What is Shell Integration?
Shell integration is automatically enabled in Kilo Code and connects directly to your terminal's command execution lifecycle without requiring any setup from you. This built-in feature allows Kilo Code to:
- Execute commands on your behalf through the
execute_commandtool - Read command output in real-time without manual copy-pasting
- Automatically detect and fix errors in running applications
- Observe command exit codes to determine success or failure
- Track working directory changes as you navigate your project
- React intelligently to terminal output without user intervention
When Kilo Code needs to perform tasks like installing dependencies, starting a development server, or analyzing build errors, shell integration works behind the scenes to make these interactions smooth and effective.
Getting Started with Shell Integration
Shell integration is built into Kilo Code and works automatically in most cases. If you see "Shell Integration Unavailable" messages or experience issues with command execution, try these solutions:
- Update VSCode/Cursor to the latest version (VSCode 1.93+ required)
- Ensure a compatible shell is selected: Command Palette (
Ctrl+Shift+PorCmd+Shift+P) → "Terminal: Select Default Profile" → Choose bash, zsh, PowerShell, or fish - Windows PowerShell users: Run
Set-ExecutionPolicy RemoteSigned -Scope CurrentUserthen restart VSCode - WSL users: Add
. "$(code --locate-shell-integration-path bash)"to your~/.bashrc
Terminal Integration Settings
Kilo Code provides several settings to fine-tune shell integration. Access these in the Kilo Code sidebar under Settings → Terminal.
Basic Settings
Terminal Output Limit
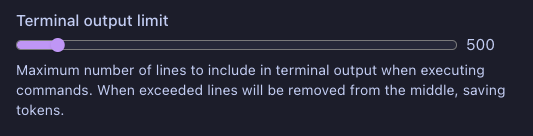
Controls the maximum number of lines captured from terminal output. When exceeded, it keeps 20% of the beginning and 80% of the end with a truncation message in between. This prevents excessive token usage while maintaining context. Default: 500 lines. Controls the maximum number of lines captured from terminal output. When exceeded, lines are removed from the middle to save tokens. Default: 500 lines.
Terminal Shell Integration Timeout
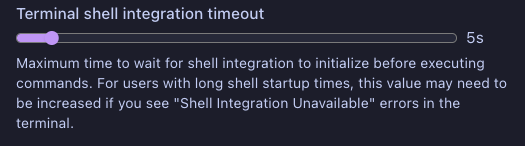
Maximum time to wait for shell integration to initialize before executing commands. Increase this value if you experience "Shell Integration Unavailable" errors. Default: 15 seconds.
Terminal Command Delay
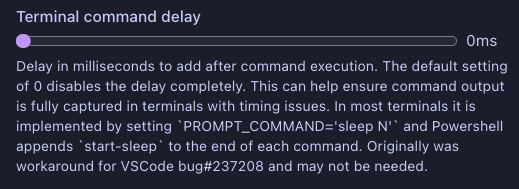
Adds a small pause after running commands to help Kilo Code capture all output correctly. This setting can significantly impact shell integration reliability due to VSCode's implementation of terminal integration across different operating systems and shell configurations:
- Default: 0ms
- Common Values:
- 0ms: Works best for some users with newer VSCode versions
- 50ms: Historical default, still effective for many users
- 150ms: Recommended for PowerShell users
- Note: Different values may work better depending on your:
- VSCode version
- Shell customizations (oh-my-zsh, powerlevel10k, etc.)
- Operating system and environment
Advanced Settings
Terminal restart required for these settings
Changes to advanced terminal settings only take effect after restarting your terminals. To restart a terminal:
- Click the trash icon in the terminal panel to close the current terminal
- Open a new terminal with Terminal → New Terminal or Ctrl+` (backtick)
Always restart all open terminals after changing any of these settings.
PowerShell Counter Workaround
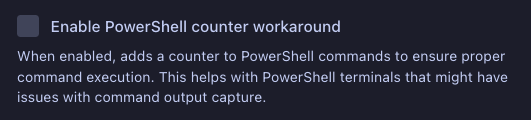
Helps PowerShell run the same command multiple times in a row. Enable this if you notice Kilo Code can't run identical commands consecutively in PowerShell.
Clear ZSH EOL Mark
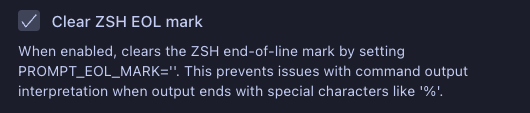
Prevents ZSH from adding special characters at the end of output lines that can confuse Kilo Code when reading terminal results.
Oh My Zsh Integration
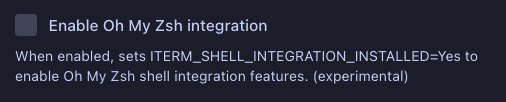
Makes Kilo Code work better with the popular Oh My Zsh shell customization framework. Turn this on if you use Oh My Zsh and experience terminal issues.
Powerlevel10k Integration

Improves compatibility if you use the Powerlevel10k theme for ZSH. Turn this on if your fancy terminal prompt causes issues with Kilo Code.
ZDOTDIR Handling
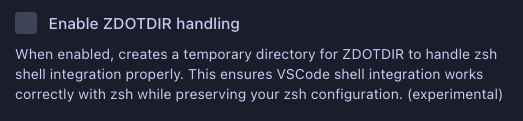
Helps Kilo Code work with custom ZSH configurations without interfering with your personal shell settings and customizations.
Troubleshooting Shell Integration
PowerShell Execution Policy (Windows)
PowerShell restricts script execution by default. To configure:
- Open PowerShell as Administrator
- Check current policy:
Get-ExecutionPolicy - Set appropriate policy:
Set-ExecutionPolicy RemoteSigned -Scope CurrentUser
Common policies:
Restricted: No scripts allowed (default)RemoteSigned: Local scripts can run; downloaded scripts need signingUnrestricted: All scripts run with warningsAllSigned: All scripts must be signed
Manual Shell Integration Installation
If automatic integration fails, add the appropriate line to your shell configuration:
Bash (~/.bashrc):
[[ "$TERM_PROGRAM" == "vscode" ]] && . "$(code --locate-shell-integration-path bash)"
Zsh (~/.zshrc):
[[ "$TERM_PROGRAM" == "vscode" ]] && . "$(code --locate-shell-integration-path zsh)"
PowerShell ($Profile):
if ($env:TERM_PROGRAM -eq "vscode") { . "$(code --locate-shell-integration-path pwsh)" }
Fish (~/.config/fish/config.fish):
string match -q "$TERM_PROGRAM" "vscode"; and . (code --locate-shell-integration-path fish)
Terminal Customization Issues
If you use terminal customization tools:
Powerlevel10k:
# Add before sourcing powerlevel10k in ~/.zshrc
typeset -g POWERLEVEL9K_TERM_SHELL_INTEGRATION=true
Alternative: Enable the Powerlevel10k Integration setting in Kilo Code.
Verifying Shell Integration Status
Confirm shell integration is active with these commands:
Bash:
set | grep -i '[16]33;'
echo "$PROMPT_COMMAND" | grep vsc
trap -p DEBUG | grep vsc
Zsh:
functions | grep -i vsc
typeset -p precmd_functions preexec_functions
PowerShell:
Get-Command -Name "*VSC*" -CommandType Function
Get-Content Function:\Prompt | Select-String "VSCode"
Fish:
functions | grep -i vsc
functions fish_prompt | grep -i vsc
Visual indicators of active shell integration:
- Shell integration indicator in terminal title bar
- Command detection highlighting
- Working directory updates in terminal title
- Command duration and exit code reporting
WSL Terminal Integration Methods
When using Windows Subsystem for Linux (WSL), there are two distinct ways to use VSCode with WSL, each with different implications for shell integration:
Method 1: VSCode Windows with WSL Terminal
In this setup:
- VSCode runs natively in Windows
- You use the WSL terminal integration feature in VSCode
- Shell commands are executed through the WSL bridge
- May experience additional latency due to Windows-WSL communication
- Shell integration markers may be affected by the WSL-Windows boundary: you must make sure that
source "$(code --locate-shell-integration-path <shell>)"is loaded for your shell within the WSL environment because it may not get automatically loaded; see above.
Method 2: VSCode Running Within WSL
In this setup:
- You launch VSCode directly from within WSL using
code . - VSCode server runs natively in the Linux environment
- Direct access to Linux filesystem and tools
- Better performance and reliability for shell integration
- Shell integration is loaded automatically since VSCode runs natively in the Linux environment
- Recommended approach for WSL development
For optimal shell integration with WSL, we recommend:
- Open your WSL distribution
- Navigate to your project directory
- Launch VSCode using
code . - Use the integrated terminal within VSCode
Known Issues and Workarounds
VS Code Shell Integration for Fish + Cygwin on Windows
For fellow Windows users running Fish terminal within a Cygwin environment, here's how VS Code's shell integration works:
-
(Optional) Locate the Shell Integration Script: Open your Fish terminal within VS Code and run the following command:
code --locate-shell-integration-path fishThis will output the path to the
shellIntegration.fishscript. Note down this path. -
Update Your Fish Configuration: Edit your
config.fishfile (usually located at~/.config/fish/config.fishwithin your Cygwin home directory). Add the following line, preferably within anif status is-interactiveblock or at the very end of the file:# Example config.fish structure
if status is-interactive
# Your other interactive shell configurations...
# automatic locate integration script:
string match -q "$TERM_PROGRAM" "vscode"; and . (code --locate-shell-integration-path fish)
# Or if the above fails for you:
# Source the VS Code shell integration script
# IMPORTANT: Replace the example path below with the actual path you found in Step 1.
# Make sure the path is in a format Cygwin can understand (e.g., using /cygdrive/c/...).
# source "/cygdrive/c/Users/YourUser/.vscode/extensions/..../shellIntegration.fish"
endRemember to replace the example path with the actual path from Step 1, correctly formatted for Cygwin.
-
Configure VS Code Terminal Profile: Open your VS Code
settings.jsonfile (Ctrl+Shift+P -> "Preferences: Open User Settings (JSON)"). Update or add the Fish profile underterminal.integrated.profiles.windowslike this:{
// ... other settings ...
"terminal.integrated.profiles.windows": {
// ... other profiles ...
// Recommended: Use bash.exe to launch fish as a login shell
"fish": {
"path": "C:\\cygwin64\\bin\\bash.exe", // Or your Cygwin bash path
"args": [
"--login", // Ensures login scripts run (important for Cygwin environment)
"-i", // Ensures bash runs interactively
"-c",
"exec fish" // Replace bash process with fish
],
"icon": "terminal-bash" // Optional: Use a recognizable icon
}
// Alternative (if the above fails): Launch fish directly
"fish-direct": {
"path": "C:\\cygwin64\\bin\\fish.exe", // Ensure this is in your Windows PATH or provide full path
// Use 'options' here instead of 'args'; otherwise, you might encounter the error "terminal process terminated exit code 1".
"options": ["-l", "-c"], // Example: login and interactive flags.
"icon": "terminal-fish" // Optional: Use a fish icon
}
},
// Optional: Set fish as your default if desired
// "terminal.integrated.defaultProfile.windows": "fish", // or "fish-direct" depending what you use.
// ... other settings ...
}Note: Using
bash.exe --login -i -c "exec fish"is often more reliable in Cygwin environments for ensuring the correct environment setup beforefishstarts. However, if that approach doesn't work, try thefish-directprofile configuration. -
Restart VS Code: Close and reopen Visual Studio Code completely to apply the changes.
-
Verify: Open a new Fish terminal in VS Code. The shell integration features (like command decorations, better command history navigation, etc.) should now be active. You can test basic functionality by running simple commands like
echo "Hello from integrated Fish!".
This setup works reliably on Windows systems using Cygwin, Fish, and the Starship prompt, and should assist users with similar configurations.
Shell Integration Failures After VSCode 1.98
Issue: After VSCode updates beyond version 1.98, shell integration may fail with the error "VSCE output start escape sequence (]633;C or ]133;C) not received".
Solutions:
-
Set Terminal Command Delay:
- Set the Terminal Command Delay to 50ms in Kilo Code settings
- Restart all terminals after changing this setting
- This matches older default behavior and may resolve the issue, however some users have reported that a value of 0ms works better. This is a workaround for upstream VSCode problems.
-
Roll Back VSCode Version:
- Download VSCode v1.98 from VSCode Updates
- Replace your current VSCode installation
- No backup of Kilo settings needed
-
WSL-Specific Workaround:
- If using WSL, ensure you launch VSCode from within WSL using
code .
- If using WSL, ensure you launch VSCode from within WSL using
-
ZSH Users:
- Try enabling some or all ZSH-related workarounds in Kilo Code settings
- These settings can help regardless of your operating system
Known Issues and Workarounds
Ctrl+C Behavior
Issue: If text is already typed in the terminal when Kilo Code tries to run a command, Kilo Code will press Ctrl+C first to clear the line, which can interrupt running processes.
Workaround: Make sure your terminal prompt is empty (no partial commands typed) before asking Kilo Code to execute terminal commands.
Multi-line Command Issues
Issue: Commands that span multiple lines can confuse Kilo Code and may show output from previous commands mixed in with current output.
Workaround: Instead of multi-line commands, use command chaining with && to keep everything on one line (e.g., echo a && echo b instead of typing each command on a separate line).
PowerShell-Specific Issues
- Premature Completion: PowerShell sometimes tells Kilo Code a command is finished before all the output has been shown.
- Repeated Commands: PowerShell may refuse to run the same command twice in a row.
Workaround: Enable the "PowerShell counter workaround" setting and set a terminal command delay of 150ms in the settings to give commands more time to complete.
Incomplete Terminal Output
Issue: Sometimes VS Code doesn't show or capture all the output from a command.
Workaround: If you notice missing output, try closing and reopening the terminal tab, then run the command again. This refreshes the terminal connection.
Troubleshooting Resources
Checking Debug Logs
When shell integration issues occur, check the debug logs:
- Open Help → Toggle Developer Tools → Console
- Set "Show All Levels" to see all log messages
- Look for messages containing
[Terminal Process] - Check
preOutputcontent in error messages:- Empty preOutput (
'') means VSCode sent no data - This indicates a potential VSCode shell integration issue, or an upstream bug that is out of our control
- The absence of shell integration markers may require adjusting settings to work around possible upstream bugs or local workstation configuration issues related to shell initialization and VSCode's loading of special shell integration hooks
- Empty preOutput (
Using the VSCode Terminal Integration Test Extension
The VSCode Terminal Integration Test Extension helps diagnose shell integration issues by testing different settings combinations:
-
When Commands Stall:
- If you see "command already running" warnings, click "Reset Stats" to reset the terminal state
- These warnings indicate shell integration is not working
- Try different settings combinations until you find one that works
- If it really gets stuck, restart the extension by closing the window and pressing F5
-
Testing Settings:
- Systematically try different combinations of:
- Terminal Command Delay
- Shell Integration settings
- Document which combinations succeed or fail
- This helps identify patterns in shell integration issues
- Systematically try different combinations of:
-
Reporting Issues:
- Once you find a problematic configuration
- Document the exact settings combination
- Note your environment (OS, VSCode version, shell, and any shell prompt customization)
- Open an issue with these details to help improve shell integration
Support
If you've followed these steps and are still experiencing problems, please:
- Check the Kilo Code GitHub Issues to see if others have reported similar problems
- If not, create a new issue with details about your operating system, VSCode/Cursor version, and the steps you've tried
For additional help, join our Discord.